The New myIDC plus Dashboard!

We'd like your Feedback!

We are rolling out a redesigned myIDC with a completely new Dashboard and would love to get your feedback!

The redesign will be in stages, so we are making the new Dashboard available first. The other tabs will be updated in the upcoming months. Please let us know your thoughts!

We’d like to know what you think of the Dashboard as well as ideas for future enhancements.

What to expect

The new Dashboard is available now. We will be updating the Research tab and the Tracker and Data tabs in the next few months. See below for what’s coming soon!

The Research Tab

This tab will consolidate the current Research and Subscription Services tabs. We have simplified the layout and added new Sort and Filter options. The left menu is also collapsible to increase the viewing area.

The Tracker and Data Products Tab

This tab combines the current Tracker and Data Product tabs. Clients can now acces all types of data products from one place and use filters to see what they want. Users can also pin their favorite products to the top of the list.

Contact us with your feedback

IDC Intranet Delivery Service Help

What is the IDC Intranet Delivery Service?

The IDC Intranet Service provides IDC subscribers with access to their subscription research content in an easily downloaded format. The service has special terms and conditions of use.

To find out more about the service and how you may set it up for your own account, please contact your sales representative. If you are not currently a subscriber of IDC Continuous Intelligence Services, please contact IDC Sales at (508) 988-7988.

Getting Help

If you are having trouble connecting to your directory, or need an SFTP client, please contact your local network support for help. If you have any questions about the content in your SFTP directory, you may contact the IDC technical support line at:

In the U.S.: (800) 343-4952 ext. 4323
Outside the U.S.: (508) 935-4323
Via email: idc_support@idc.com

IDC technical support is available 9:00 a.m. to 5:00 p.m. U.S. Eastern Standard Time. These lines are dedicated to supporting both idc.com and the IDC Intranet Delivery Service.

For assistance in Europe, the Middle East, and Africa, please contact EMEA support via email at emeasupport@idc.com.

Getting Started

You will need:

  • An SFTP client to use for downloading the files
  • A software utility program to unzip files
  • Internet access
  • The computer used to download the files must have reliable access to the Internet, and the access must be configured to initiate passive mode FTP downloads. Please consult with your local network administrators in advance of signing up for the service if you are unsure about your network configuration
  • Storage space from 100MB to 4GB

Please Note: Using an SFTP client to download files day by day is meant for testing and familiarizing only. We strongly recommend that the file download process be automated to avoid missing content.

Connecting

Once you have agreed to the terms of the IDC Intranet Service, your Customer Service Representative sends the order to our Account Fulfillment group to set up an SFTP Account for you on our SFTP server.

You will be provided with a unique directory name as well as a username/password for access to your directory.

The server address toward which you may direct your SFTP client is

intranet.idc.com

Content

The following forms of IDC content are currently packaged for the Intranet Delivery Service. You must use the idc.com site to access other forms of IDC content.

  • Audio
  • Bulletin
  • Case Study
  • Current Event
  • Event Proceeding
  • Executive Brief
  • Flash
  • IDC DecisionScape
  • IDC Link
  • IDCFlash
  • Insight
  • Insights Flash
  • Insights Insight
  • Insights Pivot Table
  • Insights Prediction
  • Insights Update
  • Newsletter
  • Perspective
  • Pivot Table
  • Prediction
  • Presentation
  • Report
  • Special Report
  • Study
  • Update
Schedule

IDC research is packaged on a regular schedule so you have access to the most up to date research on your intranet as well. The content is archived into appropriately named files:

Day.zip

Generated Tuesday through Saturday, available for download after 12pm EST.

Research published to idc.com M-F at 5pm EST is collected into IDC Intranet Delivery archives every night beginning at 2am EST the morning after it is published. So Monday research is available in the day.zip file on Tuesday, Tuesday`s research is available on Wednesday, etc. The day.zip file is not generated on Sunday or Monday.

wk.zip

Generated Tuesday through Saturday. The weekly contents, generated on a rolling 7-day collection, available for download after 12pm EST.

Research published into the day.zip file is rolled into the wk.zip file every day, as the day.zip file is replaced. So Monday research is available in the wk.zip file on Tuesday, Monday AND Tuesdays research is available on Wednesday, etc. IDC recommends downloading the wk.zip file every week (between Saturday starting at 12pm through Monday evening) to ensure all content is collected.

mth.zip

generated Tuesday through Saturday. A rolling 30-day archive, which collects all research published during the previous 30 days into one file, available for download after 12pm EST.

All or Quarterly zip files

Every Sunday, a comprehensive archive called all.zip is generated (or slightly smaller archives segmented into quarterly segments; which are named for the quarters they represent, such as 2007Q4.zip). All research dating back 18 months for each service you subscribe to, is collected, beginning at 2am EST. Files are available for download by 12pm EST every Monday. You must download this comprehensive archive at the beginning of your service to ensure you have all back content for your subscriptions.

* Please note that, due to the file size, you may receive either the quarterly zip files, or the all.zip file, but not both.

Content Descriptions

When you connect with our SFTP server, you will see a directory structure similar to this:

  • all.htm
  • all.txt
  • all.zip
  • allauto.txt
  • allbs.htm
  • day.htm
  • day.txt
  • day.zip
  • dayauto.txt
  • daybs.htm
  • mth.htm
  • mth.txt
  • mth.zip
  • mthauto.txt
  • mthbs.htm
  • wk.htm
  • wk.txt
  • wk.zip
  • wkauto.txt
  • wkbs.htm

There are several files in addition to the zip archives in your directory that provide information about the contents of your directory. Some of these files are helpful in automating procedures to check for download errors if your FTP is scripted. Following is a list of files in your IDC Intranet directory and some descriptions of their purpose.

*.txt the all.txt, day.txt, wk.txt and mth.txt files provide a text formatted listing of the research documents contained in the corresponding zip file. Each “line” in the file contains one document. The publication date, document type, title, and author are also provided.
xxauto.txt provides a list of all the document numbers in the zip file only. This is to allow our customers a listing that can easily be used to automate their intranet update process.

dayauto.txt, wkauto.txt, mthauto.txt, are examples of the auto text listing.

intra.htm intra1.htm, intra2.htm, intra3.htm, intra4.htm, intra5.htm and intra6.htm provide listings of the research documents contained in the corresponding zip file in an html-format for your web browser or Intranet page. Each intra.htm document offers a different sort of the documents: by service name, by document number, by title, by pub date, by recent research and by author. The intra.htm files are located within each of your .zip files.
xx.htm day.htm, mth.htm, wk.htm, all.htm and/or quarterly.htm all provide a list of all the documents in the zip file sorted by document id. Additional information such as the document title and the author is also available.
xxbs.htm daybs.htm, mthbs.htm, wkbs.htm, allbs.htm and/or quarterly bs.htm provide a list of all the documents in the zip file sorted by the service name.

In addition, you will find the default images for the IDC logo and the PDF logo (idclogo.gif and pdficon.gif) included in all of the zip files.

You can download any or all of the files in one session. Once you have the files on your local machine, use your password to unzip them and place them in the proper directories used by the HTTP server to serve them up on your Intranet. Please remember that your IDC subscription agreement prohibits distribution of these files via email or via posting to any web site where they are publicly accessible. If you wish to purchase IDC content for your web site, please contact your sales representative. If you have questions about your local Intranet, please contact your local network administrator

Please Note: Although it is not required, it is highly recommended that if you pick up your day.zip file, you also pick up either your week.zip or your month.zip on a regular (i.e. weekly or monthly) basis to guarantee that you get 100% of your content.

Republished Content

IDC reserves the right to republish documents at will. Republished documents will be included in your feeds along with any new documents.

Every year, IDC updates a number of their subscription program names. On January 1, any active (i.e. within 18 months of their pub date) documents that are published under the updated subscriptions will be republished to reflect the new names. Content within the documents will not change. The republished documents will appear in all feeds beginning the first week in January.

If you have any questions about this process or require assistance, please contact IDC Support via email at idc_support@idc.com or at 1-800-343-4952 ext. 4323 in the US, or outside the US at 1-508-872-8200 ext. 4323.

How To Purchase Online

Navigating through purchase

You can purchase research documents, presentations or event attendance online with a credit card.

If you are not a registered user on idc.com, you will be prompted to register before you complete your purchase. If you are already registered but have not yet logged in, you will be asked to do so before continuing.

Once logged in, you will continue to the Shopping Cart where you will find your selected items. The Shopping Cart will keep your selected items for a week, even after you log out.

Purchasing Research and Event Attendance

Event Attendance Purchase

To pay for an event registration online, click on the “Register Now” button next to an event detail, then complete the information form and click on “Finish”. This will add the event into your shopping cart.

Note: Some events require authorization for attendance. An IDC Event representative will always confirm your registration and payment methods.

Research Purchase

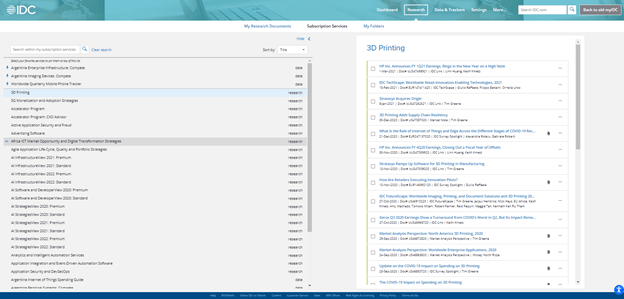
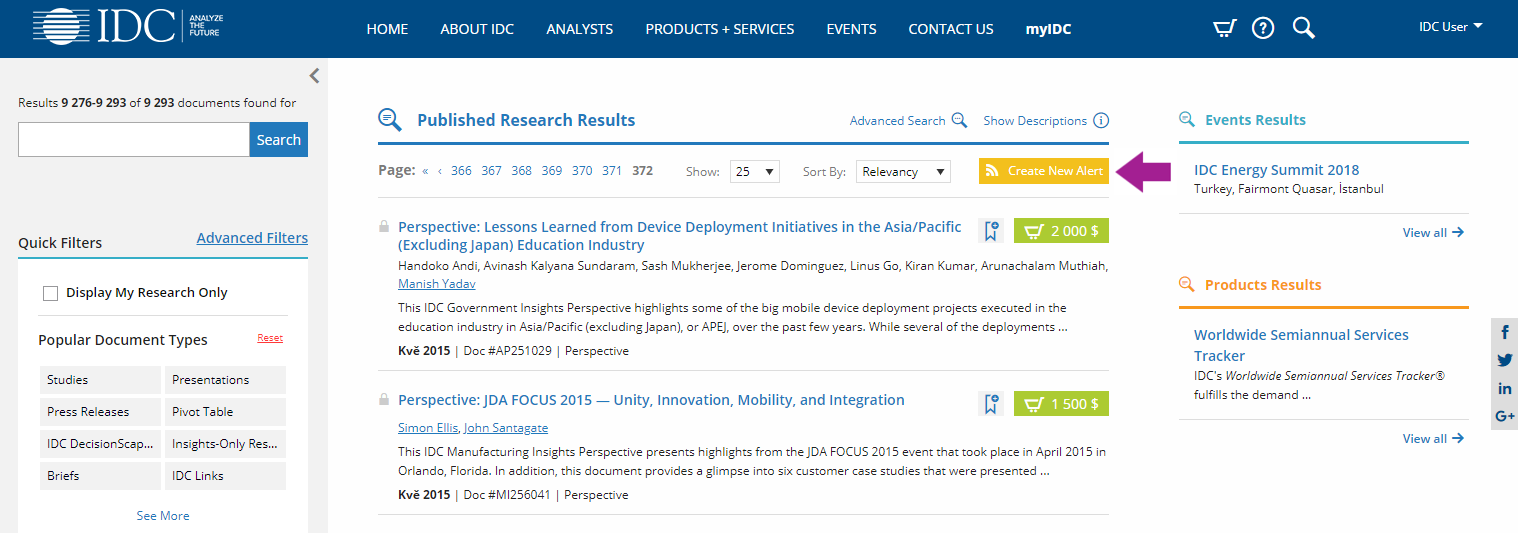
To buy a research document online, click on the green button with a shopping cart icon  either directly from a search result page, or from a document overview. This will add the document into your shopping cart.

Shopping Cart

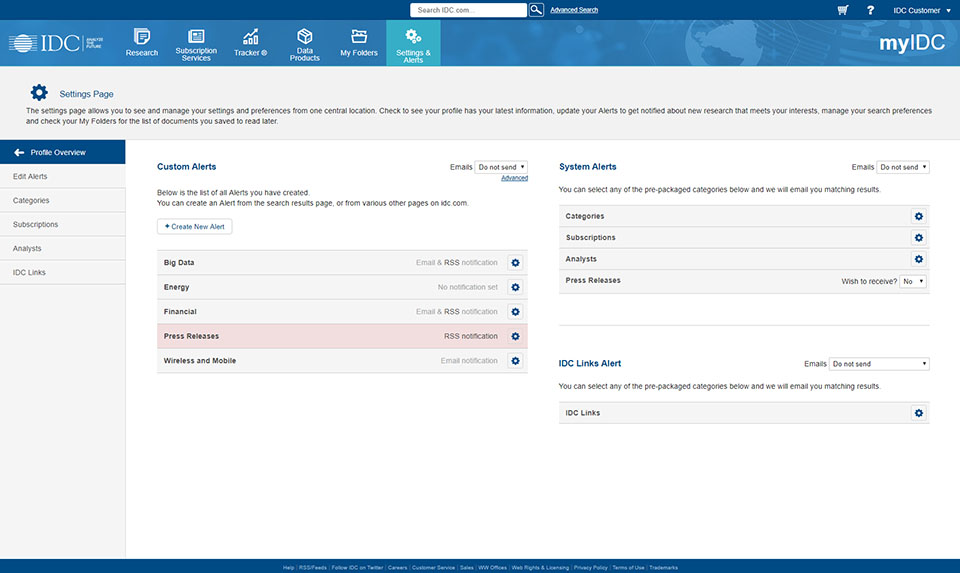
 Use this icon on the top right corner of any page on IDC.com to check what items are stored in your shopping cart.

You can delete the items at any time by clicking on “Remove” next to each item.

When you are ready to finalize your purchase, click “Checkout” button at the bottom right of the page.

Payment Options

IDC accepts Visa®, MasterCard®, Discover®, American Express®, and JCB®.

When purchasing via credit card, you will be prompted to enter your credit card information once you click on the “Checkout” button.

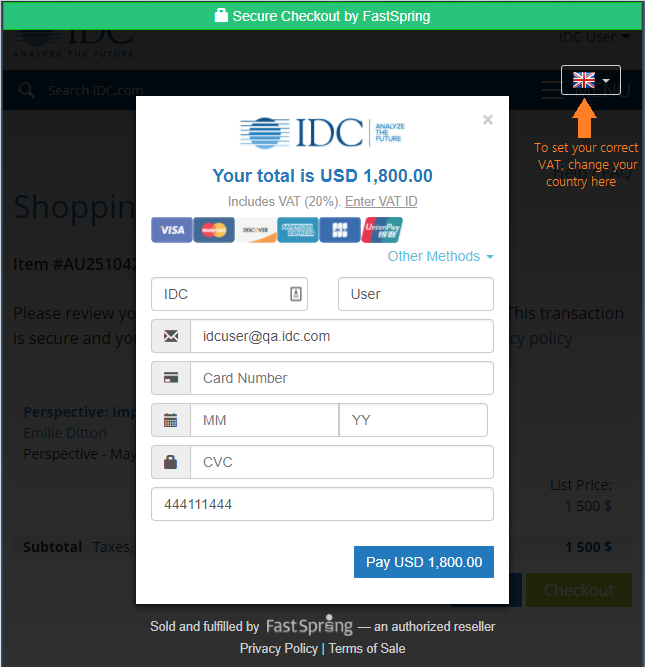
The transaction is processed through FastSpring, a trusted reseller and all information that you submit in this form are safely secured and encrypted.

Note: we prefill the form with information from your profile (like user name and email) but you can change it if needed.

VAT is set according to the selected country. You can also Enter a VAT ID directly in the form by clicking on “Enter VAT ID”.

Complete the Purchase

When you have completed all fields in the form, press the Pay button on the bottom of the form, which will trigger the payment. After your payment has been successfully processed, you will get a confirmation message and an email will be send to your email address with information about the purchase. From the email you can also access your Invoice.
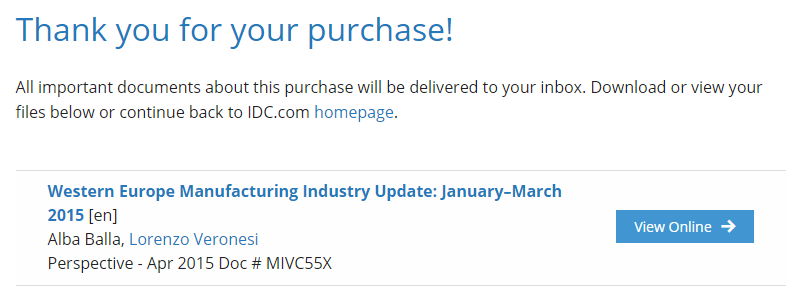
 

View Document

When you click on Continue button, you may immediately view and access your purchased document(s).

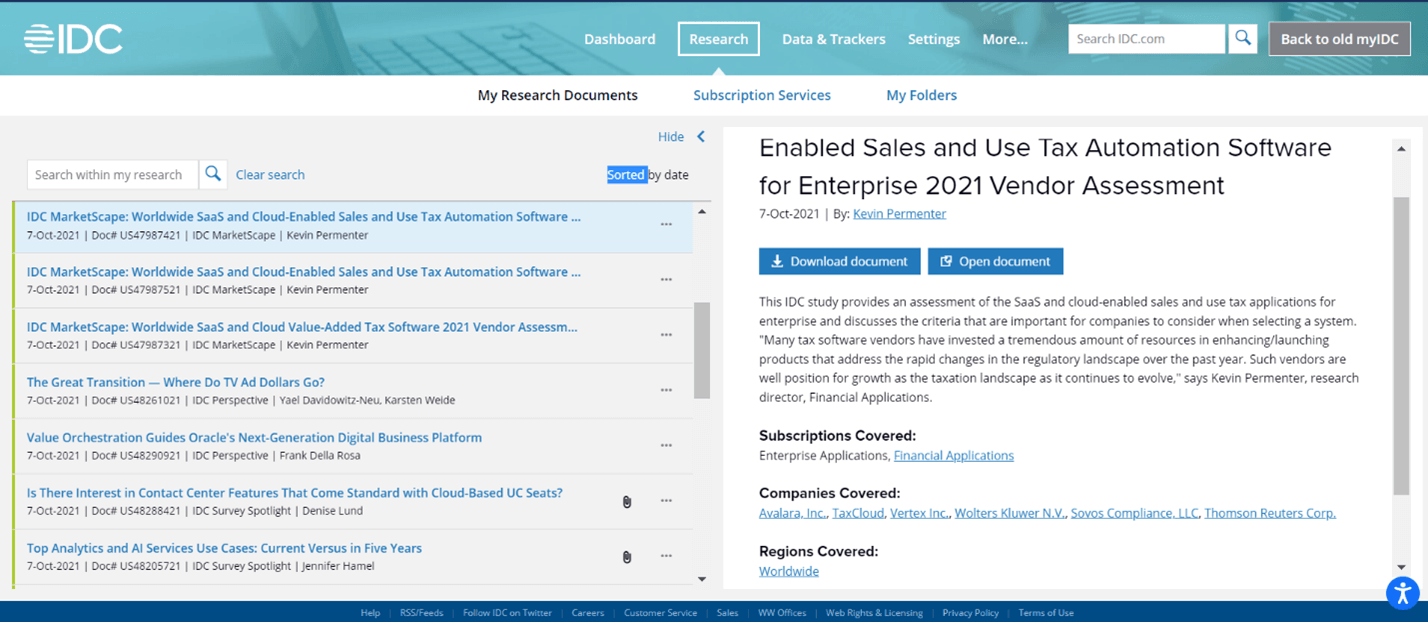
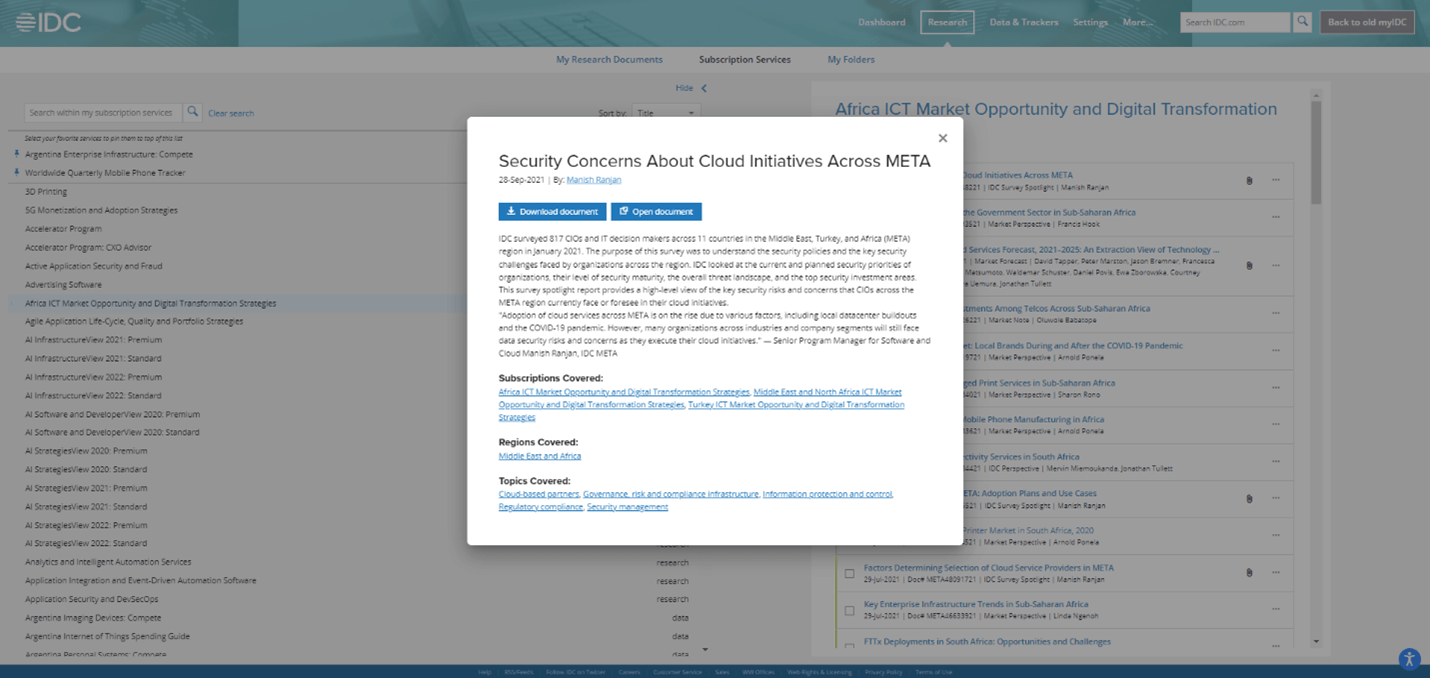
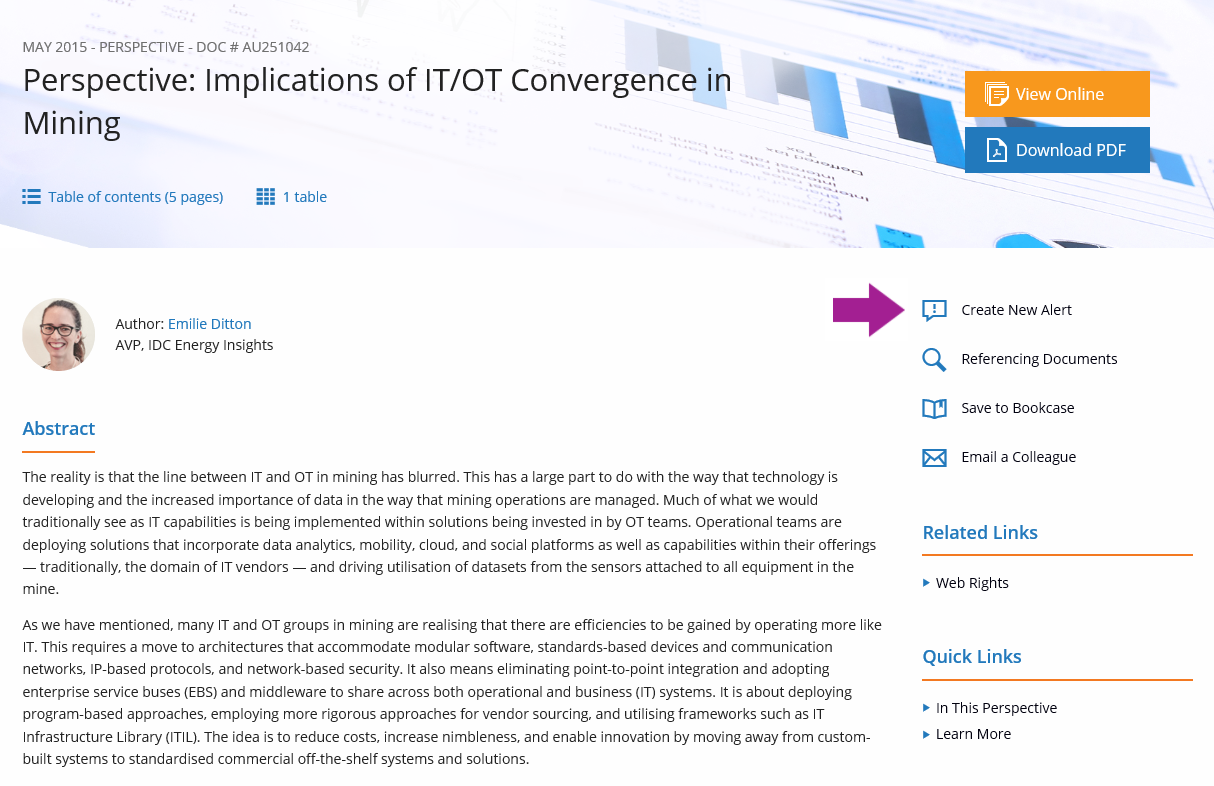
To access your document via IDC.com, click the document title, or the “View Online” button. This will take you to the document’s synopsis page. All document sections and attachments will now be accessible.

To download the PDF version of the document (if available), click the “Download PDF” button. To View the document online, click on the “View Online” button.


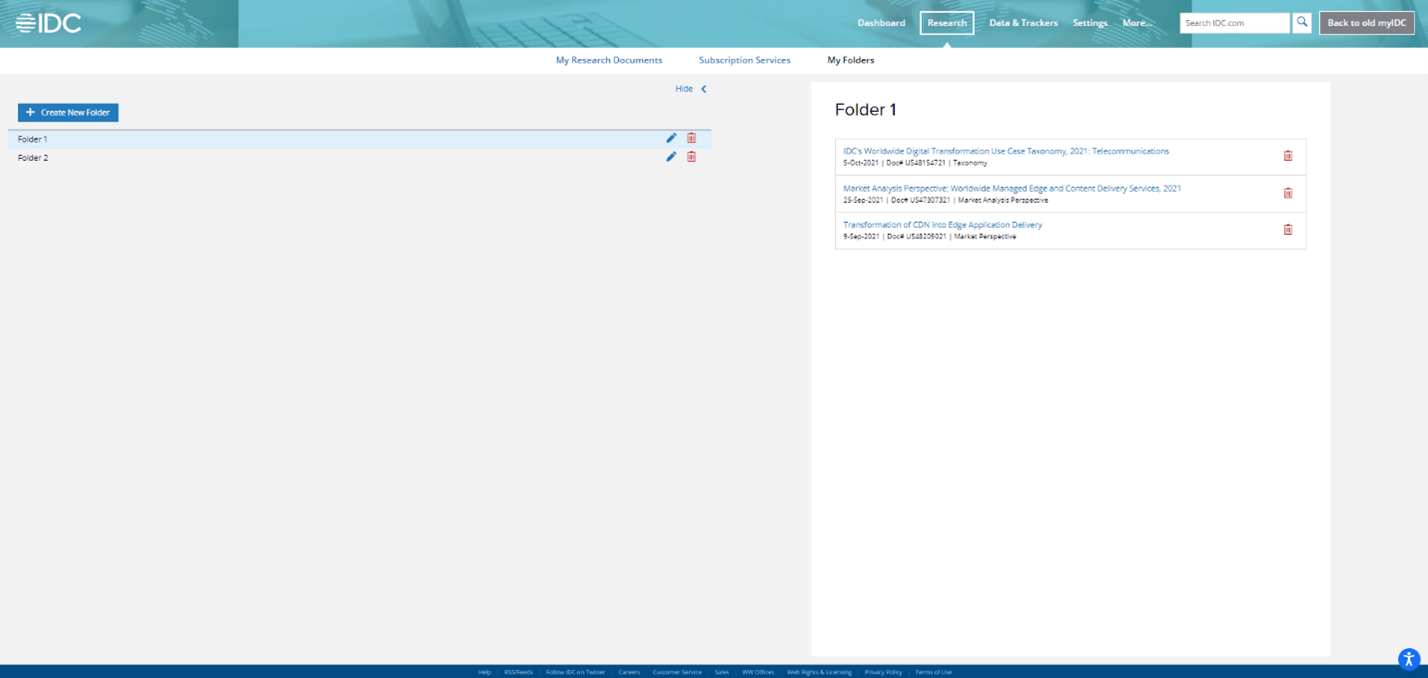
To save a link to this document in your Bookcase for easy access in the future, click the “Save To Bookcase”.

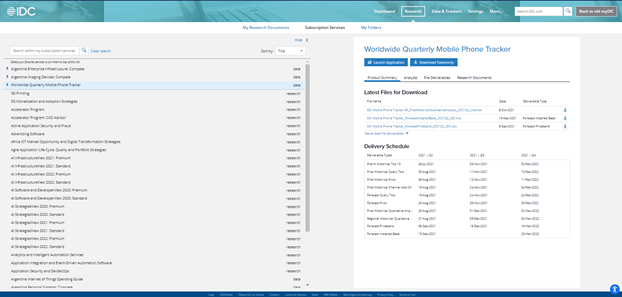
If you have purchased an event registration, the “View Online” button will redirect you to a detail page of the specific event. You will see a green field “You are already registered”. You can also see your purchased event(s) in myIDC > Events. (Note: You need to logout and login to see this).

If you have more questions about making a purchase on IDC.com, please contact our sales department.

To purchase a subscription to IDC.com research content

If you would like to become a subscriber to IDC Continuous Intelligence Services (CIS), please contact an IDC Sales representative at +1-508-988-7988.

Subscription Benefits

Subscribing to an IDC CIS provides ongoing information and analysis through a variety of channels, including written research, personal inquiries with our analysts, web conferences, access to our on-site research libraries, briefings, and conferences.

To learn more about IDC’s products and services, click on the Products and Services tab above.

IDC Planned Research Help

Navigating through IDC Planned Research

IDC’s planned research provides a preview of upcoming research documents along with projected delivery dates.

Accessing Planned Research

From the Menu

You can access Planned Research simply from the main menu on IDC’s website. Just choose “Planned Research” from the Products + Services dropdown menu. This is where you can see all IDC’s Planned Research.

From Analyst’s profile

If available, the Planned Research link will appear under the Related Links section on an analyst’s profile.

The Planned Research page accessible from analyst’s profile is filtered to show just Planned Research scheduled for this particular analyst. Such a result cannot be filtered any further. To do so, please, use the general, non-filtered, Planned Research.

From Subscription Service

The Planned Research, accessible from the page of a subscription service, is filtered to show just Planned Research, scheduled for this particular subscription service. Such a result cannot be filtered anymore. To do so, please, use the general, non-filtered, Planned Research.

Filtering the Planned Research

To access the filters in Planned Research, click on the “Show Filters” button in the upper right part of the page.

Upon clicking on this button a filter’s menu is displayed, where you can choose filters from 4 main categories.

Filter by Publication Date

The first category to choose from is Publication Date. Here you can choose the dates “From” and “To”, which means that when filtered, the Planned Research will be displaying only documents scheduled in between these two dates as a result.

If nothing is selected, the search acts as if the whole category was selected.

Filter by Analyst

The second category to filter by is Analysts. The analysts are sorted by the number of documents they have scheduled in Planned Research. To find a specific analyst, you can use the “Search by Analyst” option. After you start typing, this will provide you with suggestions. Only Analysts with some scheduled Planned Research are available.

The selected analysts are displayed in the right section of the filter’s menu, in “Selected Filters”.

When no analysts are selected, the search acts as if the whole category was selected.

Filter by Region

The third category to filter by is Region. Some facets are straight selections, others can be narrowed down. Another option is to use the “Search by Region”. Only the regions with some Planned Research assigned to them are available.

The selected regions are displayed on the right side of the filter’s menu, in “Selected Filters”.

When nothing is selected, the search acts as if the whole category was selected.

Filter by Product Name

The fourth category to filter by is Product Name. Here you can select from subscription services with some scheduled Planned Research. The structure is similar to the one on the Subscription Services page. You can either choose the whole category or narrow it down to specific product. You can also use the “Search by Product Name” option.

The selected products are displayed on the right side of the filter’s menu, in “Selected Filters”.

The selected products are displayed on the right side of the filter’s menu, in “Selected Filters”.

When nothing is selected, the search acts as if the whole category was selected.

Show Results, Remove Filters, Reset Filters

The selected filters are displayed on the right side of the filter’s menu. Here you can choose to remove all filters from a specific category by clicking on “Remove All” by the corresponding category.

To show the results click on “Show Results”.

To reset filters click on “Reset Filters”. This will remove all filters from all categories, collapse the filter’s menu and show all Planned Research.

Results

The results have the following format:

  • Name of the future document
  • Year and quarter of publishing | document type | document status
  • Analyst(s)
  • Product Name
  • Topic
Export to PDF/Excel

On the top and on the bottom of the Planned Research results, you can choose to export the results to either PDF or Excel.

When no documents are selected, all of the results are exported. The same goes for when all documents are selected.

When only some of the documents are selected, then just these selected documents are exported to PDF/Excel.

Include Published Research

This option is available only when you access Planned Research from analyst’s profile or from subscription service.

Also, it is available only when all or no documents are selected. This results in exporting a file with all Planned and Published Research of a particular analyst or product.

When only some documents are selected, the option “Include Published Research” is disabled and you are able to export only those selected documents.

Change Password & Update User Info

Every registered user of idc.com is required to provide certain information such as an email address, location, name, title, Industry, etc.

You can change your information at any time by using the Edit Profile button at the top right hand corner of every page. You will also find a link to Edit Profile under the My IDC tab. Note: changing your email address may remove you from a Corporate Account if you are a member. Check with your Corporate Administrator to verify your membership if you are unsure.

How to change your password
  1. Login to idc.com and click on the Edit My Profile button in the top right hand corner.
  2. First enter your current password, then create a new password and re-enter it for confirmation. When finished, click on “Save” at the bottom of the page.

For more information about password validation please click here

How To Navigate IDC.com

Home

Our home page lists new research, current press releases, and events. You can also navigate to any of our Insights websites, or select from a drop down menu of our country-specific and regional web sites.

About IDC

Information about our company including our management team, worldwide office addresses, methodology and careers.

Analysts

Search for IDC analysts by name, research coverage, geographic coverage or location.

Products & Services

Displays an interface to help you find out more about IDC’s areas of expertise and our research products, events and services.

Events

Our global events home page displays links to all regional events, Web Conferences and special event offers.

Contact Us

Offers a variety of ways to contact us at IDC, depending on your needs. For example, you can schedule a Vendor Briefing, get Permission to Quote IDC, or contact Customer Service.

My IDC

Your personalized space on idc.com, created when you registered for your account. Here is where you will find lists of all your purchases, subscription research, and event attendee and web conference links. Your Bookcase will list your saved searches and you can set up email alerts for new research on your Preferences page.

Local Sites

If you are interested in one of our local websites, which may be in the local language, please click here to see a list of the available options, grouped by region.

Your myIDC Pages

Navigating through myIDC

When you register on idc.com, a personal myIDC page is created for you. You will see a link for “myIDC” in the main navigation. Click on the tab to go to your myIDC pages. In the navigation of this page you will see the following:

  • Dashboard: This gives a high-level summary of items you may be interested in, including information on your custom alerts, upcoming research, analysts you’re following, file deliverables, and upcoming data deliverables.
  • Research: This gives you a list of all the research documents and subscriptions you have access to. You can also create folders in this tab.
  • Data & Trackers: This gives you a list of all the data & tracker products you have access to.
  • Settings: This section allows you to manage your profile information and custom alerts.
Dashboard Tab

The Dashboard tab allows you to create a personalized view of your data, alerts, favorite analysts, and upcoming research. It consists of widgets which you can add, move, or remove based on your preferences.

  • Add widgets by clicking on Customize Dashboard > Add Widget and selecting your desired widget. Click Add to confirm your changes.
  • Move widgets by clicking on the crossed arrows icon on the header of a widget that you want to move. Click and hold this icon to drag the widget to desired location.
  • Remove widgets by clicking on the trash can icon on the header of a widget that you desire to remove.
  • Reset to the default dashboard by clicking on Customize Dashboard > Reset to default and selecting Reset.

My Custom Alerts Widget

The My Custom Alerts widget displays research in your pre-defined areas of interest, just like a saved search.

If you do not have an alert created yet, the widget will not display any documents. Follow the steps below to create your own alert:

  1. Click on Create New Alert.
  2. Complete an empty search with your predefined filters OR search for a specific topic with your predefined filters using the search bar. You can set up your filters using the Advanced Filters section on the left side of the page.
  3. Click Search.
  4. Click on the Create New Alert button on the top right corner to save this specific search.
  5. In the pop-up, name your new alert.
  6. In the pop-up, you will have the option to set up either email or RSS notifications if desired.
  7. Click Save.

In this widget, there are a few default alerts. You can also choose to show all IDC research, or all your purchased research as follows:

  • If you select, Show me > All IDC Research, you’ll see the latest IDC research that has been published.
  • If you select, Show me > All My Research, you’ll see the latest IDC research that has been published that you have access to.

Tip: The Show me drop down selection is remembered, and you can add multiple My Custom Alerts widgets with different Show me values. This allows you to see all your areas of interests on one screen.

Upcoming Research Widget

The Upcoming Research widget displays the research schedule for upcoming research reports. If you want to see the full research schedule for all IDC Subscription services, click on the See All Planned Research button at the bottom of the widget.

Followed Analysts Widget

The Followed Analysts widget displays the most recent research of your favorite analysts. To follow and unfollow an analyst, refer to the steps below:

  • Click Follow New Analyst on the widget.
  • You will be redirected to our Analyst Page, where you can find your analyst using the filters or scrolling through the page. Click on the analyst’s name or profile picture to go to their profile page.
  • On the top right corner, click Follow Analyst. Once you are following an analyst, they will appear on the Followed Analysts widget.
  • To unfollow an analyst, click the analyst’s name on the widget, which will bring you to their profile page. Click the Unfollow Analyst button on the top right corner.

You can follow as many analysts as you wish. All new research and updates from those analysts will be included in your My Custom Alerts widget as well.

Latest Files Deliverables Widget

The Latest Files Deliverables widget displays the latest files delivered from your purchased data products. To see all your files, click on See All Data File Deliverables on the bottom of the widget. You will be redirected to a page that displays all your files. To download the file, click on the title or the Download icon.

Upcoming Data Deliverables Widget

The Upcoming Data Deliverables widget displays the upcoming releases of data files for your purchased data products.

Research Tab

The Research tab allows you to view all the research documents and subscriptions that you have access to and allows you to organize everything in folders.

My Research Documents

The initial page you will see is All My Research. On the left side of the page, you can see all the research documents you have access to.

You can use the search bar within this page, labeled Search Within My Research, to search for specific terms in the document titles. If a document is new and hasn’t been a read, the title will be bold and a green banner will exist on left. The three ellipses to the right of the title gives you the option to add that document to a folder, email that document to a colleague, or change the status of that document from read to unread.

The right-hand column displays a preliminary view for whichever document is selected in the left column. This view gives you high level information about the document. If you have access to the document, you can click the Open Document button to view the document in your browser, or you can click Download Document to save a PDF to your computer.

Subscription Services

The second page you will see within the Research Tab is Subscription Services. On the left side of the page, you can see a list of services you have access to.

If you want to look for a specific service, you can use the search bar within that page, labeled Search Within My Subscription Services. You can also pin your most used services to the top of the screen, so you don’t have to search for them. You can do this by hovering on the left side of the subscription title and clicking the “pin” button.

In the right-hand column, you will see information related to that service.

  • For data subscriptions, you will generally see a product summary, associated analysts, associated files, associated research documents, and a delivery schedule. You will be able to launch this data product in the Query Tool using the Launch Application button and you can download the taxonomy for the product using the Download Taxonomy button (if available).

  • For research subscriptions, you will see a list of related research documents.

Like the My Research Documents page, if you are viewing a new and unread research document on the Subscription Services page, the title will be bold, and a green banner will exist on the left. The three ellipses to the right of the title give you the option to add the document to a folder, email the document to a colleague, or change the status of the document from read to unread.

On this page, you also have the option to download multiple documents at once. You can select up to ten documents and save them to a zip file. This zip file includes the document PDF and any attachments. Alternatively, you can select multiple documents and download the high-level document information, including the abstract, to a spreadsheet.

Lastly, you can click on the title to read the document abstract. From here you have the option to view the document or to download a PDF.

My Folders

The third page you will see within the Research Tab is My Folders. Folders are a fast way to organize and refer to your research documents.

To create a folder from the My Folders page, click on the blue Create New Folder button on the left side of the page. To rename a folder, click on the pen icon and to delete a folder click on the trash can. On the left side, you will see all the folders you have created. If you click on a specific folder, you will see all the files in that folder on the right side of the page.

You can add something to your folder in several ways:

  • On myIDC…
    • On the myIDC dashboard, you’ll see a folder icon next to research documents. If you click this icon, you can add it to a new or existing folder.
    • On the My Research Documents page and the Subscription Services page, you’ll see three ellipses next to documents, which will give you the option to add the document to a folder.
  • On idc.com…
    • In search, you’ll see a folder icon next to some search results. If you click on that folder, you can add that document to a new or existing folder.
    • In the document at a glance view, you’ll see an “Add to Folder” button at the very top.
Data & Tracker Tab

The Data & Tracker tab gives you a list of all the data and tracker products you have access to. If you want to look for a specific product, you can use the search bar on that page, labeled Search Within My Products. You can also pin your most used products to the top of the screen, so you don’t have to search for them. You can do this by hovering on the left side of the subscription title and clicking the “pin” button. Lastly, you can sort your products by title or product type.

In the right-hand column, you will generally see a product summary, associated analysts, associated files, associated research documents, and a delivery schedule for the product you have selected in the left column. You will be able to launch this product in the Query Tool using the Launch Application button and you can download the taxonomy for the product using the Download Taxonomy button (if available).

Like the My Research Documents page, if you are viewing a new and unread research document, the title will be bold, and a green banner will exist on the left. The three ellipses to the right of the title give you the option to add the document to a folder, email the document to a colleague, or change the status of the document from read to unread.

On this page, you also have the option to download multiple documents at once. You can select up to ten documents and save them to a zip file. This zip file includes the document PDF and any attachments. Alternatively, you can select multiple documents and download the high-level document information, including the abstract, to a spreadsheet.

Settings and Alerts

This section allows you to manage most of your IDC.com preferences in one place – including your custom alerts, system alerts, and profile information.

My Profile

Your profile contains your user information such as name, company, address, and email. You can update this information any time by clicking Edit My Profile on the top right of that section. You can also update your preferences for promotional emails here.

My Custom Alerts

The My Custom Alerts functionality allows you to get notifications on research in your pre-defined areas of interest, just like a saved search. You can create a new alert by clicking Create New Alert on the top right of the My Custom Alerts section. Please refer to this section [link to My Custom Alerts Widget] if you’re interested in learning more about how to create a new custom alert.

In this section, you can also manage your custom alerts. Click the gear icon, which will allow you to do the following:

  • Updating search criteria: Select Update Alert to change your search criteria.
  • Deleting alert: Click the red Delete button on the bottom left of the pop up.
  • Changing alert name: Change the alert name by changing the text in the first box. Click Save.
  • Notifications: If you want notifications for your alert, click the Notify Via drop down and select either email or RSS feed. Click Save.
    • If you have several alerts, you can get group notifications by selecting Group Notifications on the My Custom Alerts section, so you only get one notification for all your alerts.
    • You can change the frequency of how often you receive a notification by selecting an option from the Frequency drop down, also located in the My Custom Alerts section.

My System Alerts

My System Alerts gives you ‘prepackaged’ notifications (previously known as New Research Notifications) based on your selection of an analyst, region, subscription, product, topic, or market. In this section, you can manage your system alerts by clicking the gear icon for each type of prepackaged alert. When you click this icon, you will have the ability to select from a drop down of different options. Again, you will be able to select the frequency of the notification.

Help Center

How to Login and MFA

You will find a “Login” link in the upper right-hand corner of every page on idc.com. To login, fill in the email and password you have chosen during your registration and click Login.

If this is your first Login or a new device and/or browser, you will need to provide a security code to fulfill our Multi Factor Authentication.

Multi-Factor Authentication (MFA)

To ensure that you are the only person who can access your account and your data on IDC.com, even if someone knows your password, IDC has implemented an extra layer of security protection for your account on IDC.com.

How it works

With MFA, only you can access your account on a specific trusted device and web browser. When you want to sign into IDC.com on a new device and browser for the first time, you will need to provide two pieces of information – your password and a security code that will be sent to your email address.

You will copy the security code in a following format “CASMFA-123456” and paste it to the requested field.

After you Submit the code, you have an option to “Register” the device and the web browser you are using into your trusted devices. If you do, you will not be prompted for MFA for the next 6 months on that device and browser and IDC.com will require only your password to sign you in.

If you choose “Skip” you will have to fill in the security code with your next sign in.

In case you will use new device or another browser, you will be prompted to pass MFA again. You can register as many devices and/or browsers as you want.

Contact IDC Technical Support if you need to remove your device from trusted devices.


I forgot my Password

If you forget your password, go to the Login page and click on the “Forgot my Password” link to have the site email you a link to reset it.

Logout

To logout, click on your name in the top right-hand corner of the site, then click on the Logout link that appears. Your session will be ended, and you will need to re-enter your password to login again.

Browsing Products & Services

Our Products and Services tab allows you to navigate through our many areas of expertise by four main areas:

  • Technology Area
  • Industry
  • Product Type
  • Focus Areas – Microsites

Clicking on any of the four tabs will display the options available in that particular area. You can then click on any of the options to see more information about that area of expertise as well as links to get further details.

To browse through our research, organized by Technology areas, click on Product Type, then click on Research Reports. Select the area you are interested in to read a brief synopsis of our coverage in that area. Clicking on the Go to Search results link will take you to our research reports in that particular area.

When viewing our research reports, the locked icon  indicates you do not have access to a document. Clicking on the title will present the document’s synopsis where you can determine if you would like to purchase access to the document.

Documents that are accessible to you will not display a lock and will instead display links to read the full document online or download a PDF of it.

How to set up and use Alerts

Registered users can set up Alerts to be notified of any new research that meets their area of interest. The alerts can be received via email or as an RSS feed. You can set up and manage your alerts on Edit Alerts page but you can create alerts from various places on IDC.com.

Setting up Alerts from a search

First, you need to be logged in to be able to set up your Alerts. On your search results page, you’ll notice a “Create New Alert” button.

When you have refined the search to your satisfaction, click on the “Create New Alert” button. A popup window will ask you to select your preferred notification – email, RSS or both. You must also give your alert a name so you can identify it later. Once you have completed the requested information, click on the Save button.

If you have only created an Email Alert, you will next see a confirmation Window. Simply click Close to complete the process.

If you have selected RSS Notifications, you will see an additional window to pick the RSS reader you prefer.

If the RSS reader you prefer is listed, simply click on the reader name and you will be transferred to that interface to complete setting up your RSS feed. If you use a different RSS Reader, you can copy the URL listed and paste that into your reader of preference. Or you can set up the RSS feed later from your Edit Alerts page.

Alerts set up from a Search are “inclusive”. This means it is based on a combination of AND and OR Boolean queries. So, for example, if your alert is for keyword = “cloud” and specifies analysts Frank Gens and Raymond Boggs, you will get documents that are authored by EITHER Frank Gens OR Raymond Boggs, AND contain the word “cloud”.

Setting up Alerts from a specific document

If you find a specific document that is particularly interesting and you wish to be notified when similar documents are published, click the Create New Alert button from the overview of that document.


A popup window will ask you to select your preferred notification – email, RSS or both. You should also select the specific attributes you are interested in, for example, the authors, regions covered, Topical Categories, Subscription Services or all. (Your Alert will return an exact match for whichever attributes you select). You must also give your Alert a name so you can identify it later. Once you have completed the requested information, click on the Save button.


If you have only created an Email Alert, you will next see a confirmation Window. Simply click Close to complete the process.

If you have selected RSS Notifications, you will see an additional window to pick the RSS reader you prefer.


If the RSS reader you prefer is listed, simply click on the Reader name and you will be transferred to that interface to complete setting up your RSS feed. If you use a different RSS Reader, you can copy the URL listed and paste that into your Reader of preference. Or you can set up the RSS feed later from your Edit Alerts page.

Alerts set up from a Document are “exclusive”. This means it is based on an exact match. So, for example, if the original document was written by Frank Gens and Raymond Boggs, and you specify Analysts in your match criteria, you will get documents that are authored by BOTH Frank Gens AND Raymond Boggs.

Setting up Alerts from an analyst profile

In case you are interested in research done by a particular analyst you can set up an Alert from the analyst profile page. Click on “Create new Alert”. A popup window will ask you to select your preferred notification – email, RSS or both. You must also give your Alert a name so you can identify it later. Once you have completed the requested information, click on the Save button.

If you have only created an Email Alert, you will next see a confirmation Window. Simply click Close to complete the process.

If you have selected RSS Notifications, you will see an additional window to pick the RSS reader you prefer.

If the RSS reader you prefer is listed, simply click on the Reader name and you will be transferred to that interface to complete setting up your RSS feed. If you use a different RSS Reader, you can copy the URL listed and paste that into your Reader of preference. Or you can set up the RSS feed later from your Edit Alerts page.

Setting up Alerts from a fact sheet

In case you are interested in research for a specific subscription service, you can create an alert from a factsheet. Go to a factsheet and Click on “Create new Alert”. A popup window will ask you to select your preferred notification – email, RSS or both. You must also give your Alert a name so you can identify it later. Once you have completed the requested information, click on the Save button.

If you have only created an Email Alert, you will next see a confirmation Window. Simply click Close to complete the process.

If you have selected RSS Notifications, you will see an additional window to pick the RSS reader you prefer.

If the RSS reader you prefer is listed, simply click on the Reader name and you will be transferred to that interface to complete setting up your RSS feed. If you use a different RSS Reader, you can copy the URL listed and paste that into your Reader of preference. Or you can set up the RSS feed later your Edit Alerts page.

Managing Existing Alerts

To manage the Alerts you have already created, go to your myIDC, Settings & Alerts, Alerts page.


On this page, you will see a list of the Alerts you have created and the Alert Type you selected, either Email, RSS or both. You can also tell if the Alert was created from a Search, a Document, an analyst profile or a fact sheet. (As described above, they behave slightly differently.) You may remove an Alert by clicking first on this icon  
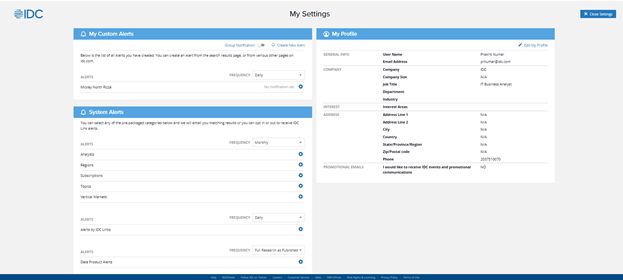
of specific Alert and then on Delete.

Clicking on the RSS link for each Alert will load a page showing the most recent documents for that Alert. You will also be able to copy the RSS feed URL and/or select a different RSS Reader.

If you wish to change the parameters for your Alert, click the Settings button for that particular Alert. The dropdown will allow you to rename your Alert, delete it, refine it and/or change notification method.

To refine your Alert, you can click on Edit Refines. You will be shown a search that corresponds to the alert settings. You can modify the Content types, language, companies covered, analysts, document types, topics, vertical markets and publication source. Once the filter selection corresponds to your needs you can save the modified alert by clicking on “Save Alert”.

Email Preferences

If you have chosen to receive your Alerts via email, you may choose how often to get the emails and the email format. Make the selections you prefer and click Save. Your selections will apply to all your Alerts.